 Home Panel
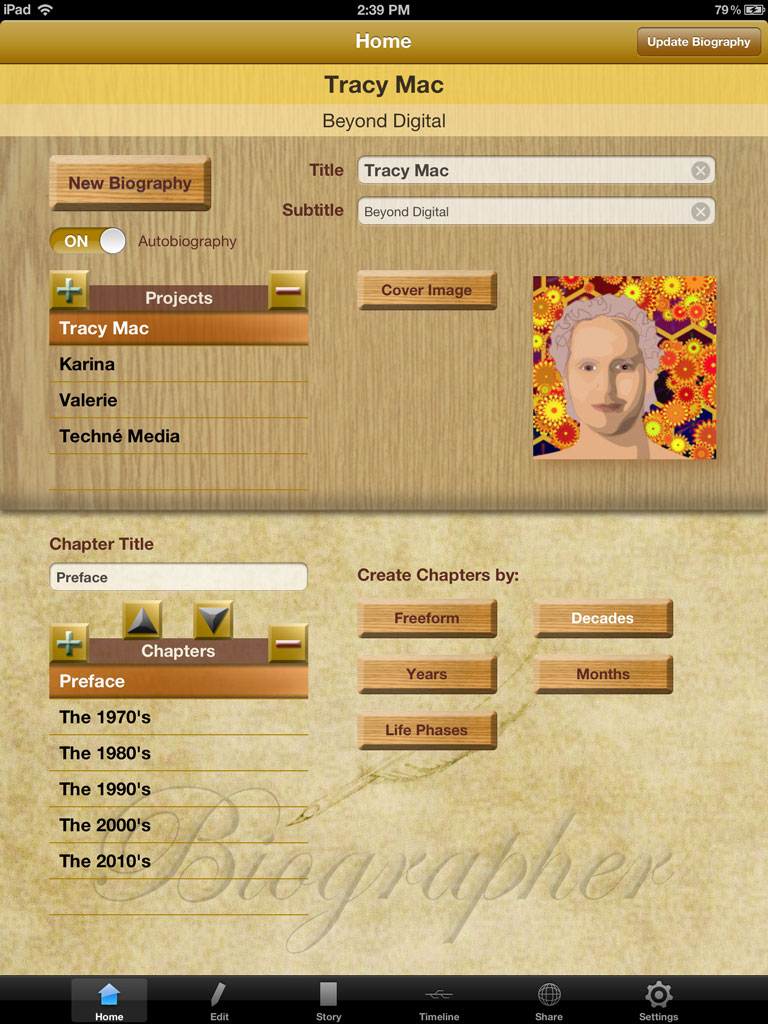
At the top you will see the current biography Title and Subtitle.
To create a New Biography, enter a Title and a Subtitle into the fields up top and tap New Biography or the Plus button in the projects list. You can change these titles at any time and tap Update Biography in the navigation bar up top.
Your new biography will appear in the Projects list where you can select it or delete it.
The autobiography switch is optional and will not effect the story at this point but is reserved for future versions.
Select a Cover Image by tapping that button and then picking an image from your iPad image library. Keep in mind this will represent your biography on the iBooks bookshelf so try to make it look like a book.
All biographies or stories must have at least one chapter and we create the first one automatically which you can rename as desired (tap Update Biography with the chapter selected and you should see the Biographer Watermark animate).
For your convenience, you can auto-generate multiple chapters using the Chapter Generation Buttons as follows:
- Freeform: 10 generic chapters are created
- Decades: creates all decades to present from the decade you select
- Years: creates chapters for each year from the year you select
- Months: creates monthly chapters from the starting date you select
- Life Phase: creates chapters based on the common phases of life that you can change, add to or remove as desired.
You can always change the name or the order of a chapter in this panel, regardless of whether it was auto created. Change the order of chapters using the two arrows at the top of the Chapter List. The order they appear here is the order they will appear in your story.
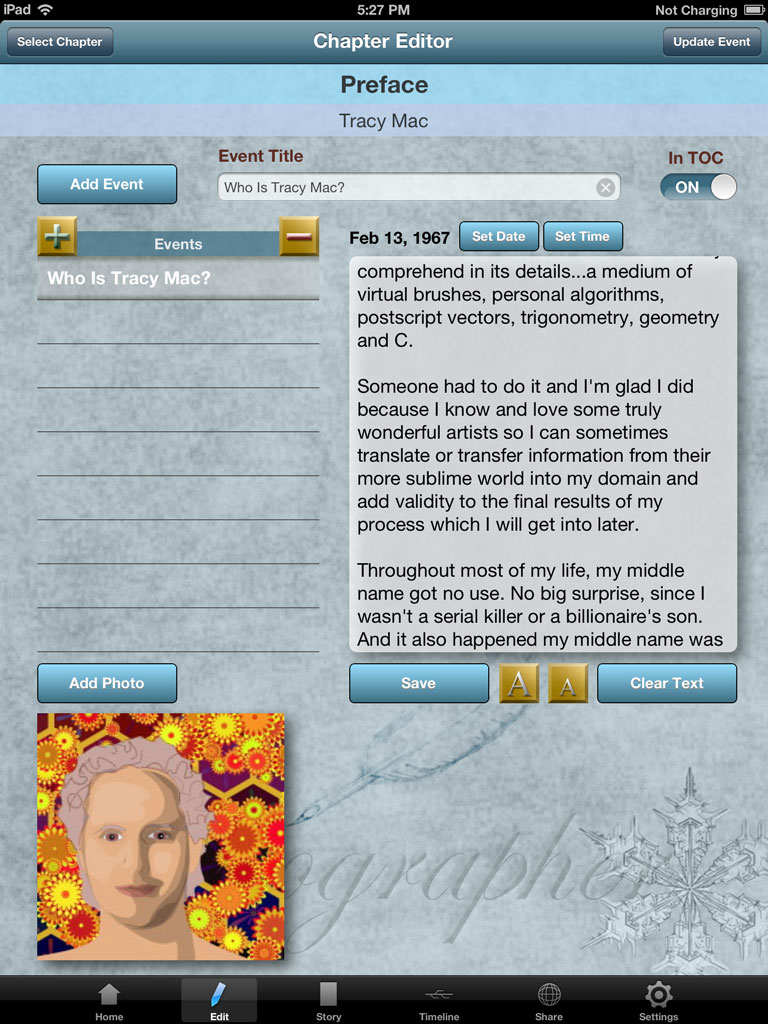 The Chapter Editor
The Chapter Editor is used to add new "events" which can be anecdotes, memories, thoughts, background information, etc. Each event is given a time tag so it can be sorted later.
The Events List shows all events associated with the currently selected chapter.
To create a new event, fill in the Title field and Tap Add Event. The Date Picker will appear and it's a good idea to get in the habit of at least setting an approximate date for the event. Not all "events" really have dates but may be more of a background material or a general observation. Nevertheless, use the date picker to set the order that you want it to appear in your story. We will add a tool to move events to other chapters in the near future as well as ways to categorize your events better. You can change the date or time of an event any time.
An event has a story that can be of any length. You could even make a book with one event that was one big story if that's what you wanted but that might make it harder to manage.
If you prefer, you can speak your stories directly instead of typing because the iPad comes with Voice Recognition built in for this purpose. Never has it been easier to tell and share your unique stories. To add or not add an Event Title to the Table of Contents, switch on or off the In TOC switch and tap Update Event or Save.
Events can be given titles and optionally can be added to the Table of Contents of the eBook and can work as sub-headers in the formatted output.
Additionally, you can add media (currently only photos) to your events. You can have events that are only media and have no text or only have a caption if you like. Tap the Add Photo button to add a photo to an event.
Your Chapters will build up as a series of events, media and combinations thereof and that's really all there is to building up your story.
It's pretty simple. Just keep adding events to your chapters and before you know it, a story will emerge which you can always see in the Story Panel. Since it's all in a database, at any time you can revisit your event and add or edit your text and change pictures and captions.
To change the order of an event, give it an earlier or later date and/or time than another event.
You can switch chapters using the Select Chapter button in the top navigation bar or by going to the Home Panel and selecting from the Chapter List.
The Story and Timeline Panels
The Story Panel is for getting a rough idea of how your story is coming together, including titles, pictures, captions and text. It will update any time the story data changes. You can also print this view out in which case you may want to use some of the formatting options such as hiding dividers or pictures or changing the text size.
The Timeline Panel is a useful tool for seeing all of your events in chronological order, regardless of chapter. Tapping on an event in the list will take you to the Editor for that Event. We will add additional views to the timeline in future versions. Use the handy search tool up top to find events that contain an occurence of text.

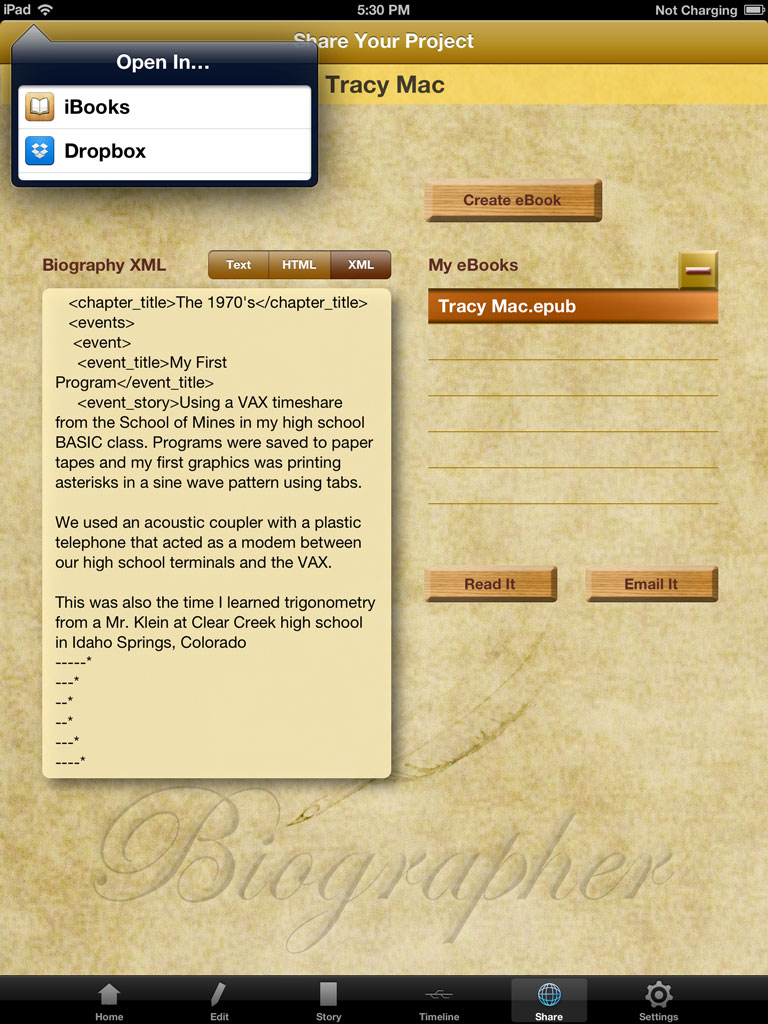 The Share Panel